Digital images often come in various resolutions, and one crucial factor that determines their quality is DPI (dots per inch). DPI is a measure of the image’s pixel density and affects its sharpness and print quality. Sometimes, you may need to increase the DPI of an image for printing, publication, or other purposes. In this guide, we will walk you through a step-by-step process on how to increase image DPI while maintaining quality.
Step 1: Determine the Current DPI
It is important to note the current DPI before enhancing the DPI of an image. This data is either embedded in the image’s metadata or retrievable through a program such as Photoshop. This will allow you to raise DPI with confidence since you know your initial settings.
Step 2: Choose the Right Software
Pick a trustworthy photo editing tool that allows for changes in DPI. There are a few options that include Adobe Photoshop as a popular choice. Other effective alternatives are GIMP and CorelDRAW. The most up-to-date edition of your selected software will give you optimal results.
Step 3: Create a Copy of the Image
Every change must start with a copy and not with an original photograph in order not to loose the initial quality of the photo. This way, you will be able to revert to the initial state whenever necessary and prevent permanent modifications.
Step 4: Open the Image in the Editing Software
Load the image in the software you prefer to work with. Dragging the image file into most software program’s workspace is simple, hence. After opening the picture, click the picture’s properties or a canvas size.
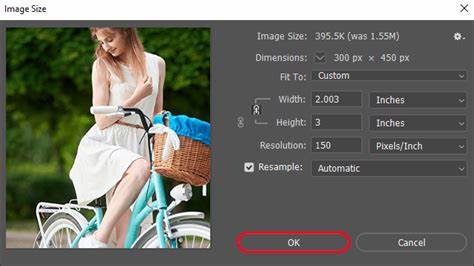
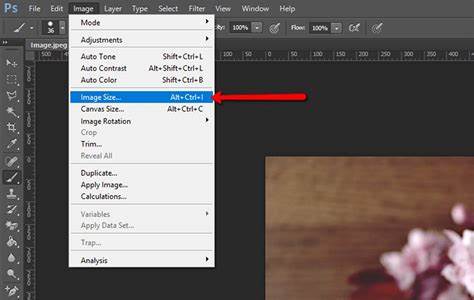
Step 5: Adjust the Image Size
To increase the DPI without changing the image’s physical dimensions, you will need to adjust the image size. In Photoshop, go to ‘Image’ > ‘Image Size.’ Uncheck the “Resample” option, ensuring the dimensions remain the same, and then increase the DPI value. Note that increasing DPI will lower the pixel dimensions.
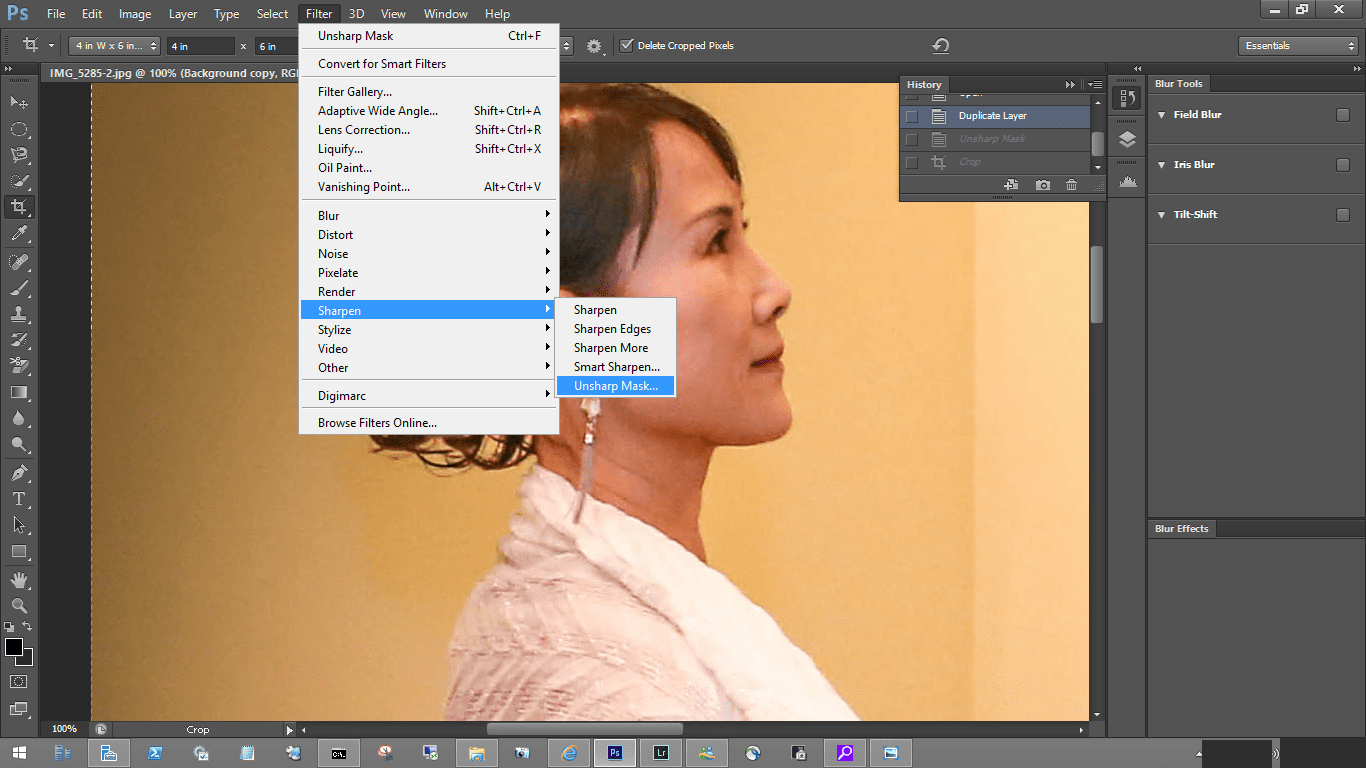
Step 6: Enhance Image Quality
Changing DPI can make your picture less sharp,Enhance Image Quality. However, you can employ the sharpness tools available in your editing software to overcome this problem. The only solution is to put some sharpening techniques like Unsharp Mask or Smart Sharpen in order to restore much of the detail that was erased.
Step 7: Save the Image
Once you’re satisfied with the increased DPI and image quality, saving your work is essential. Choose the appropriate file format for your needs; JPEG or TIFF formats are commonly used for print. Be sure to use a high-quality compression setting for the best results.
Step 8: Printing Considerations
Get a good printer that can handle this much of dpi for a printout. As a result of this, ensure that you use good quality paper and ink.# To be sure, it is important your image matches the printing hardware you use so you get output at its best.
Step 9: Testing and Revising
It is advisable to print a small test sample after increasing the DPI to assess the outcome of the image. If you do this, it will give you an opportunity for correction of any errors before going to a larger production volume. You should also preview the image on different monitors, if you are going to use it digitally, just to be sure.
Step 10: Document the Changes
It’s a good practice to record the changes you made to the image, including the new DPI value and any other adjustments. This documentation can be valuable if you need to reproduce the image in the future or want to maintain consistency across multiple images.
Final Thought
Increasing the DPI of an image can be a useful step in improving its quality for printing or digital purposes. Following these step-by-step instructions and using quality image editing software can enhance your images while maintaining their integrity. Remember to create duplicates, carefully adjust, and test the results to achieve the best outcomes for your needs.