In today’s digital age, we often find ourselves needing to manipulate images for various purposes, be it for professional design work, personal projects, or sharing high-quality photos on social media. One common task is to increase the resolution of a PNG image to make it crisper and more detailed. While this might sound like a complex task, fear not; we’ve got you covered. In this article, we’ll guide you through the process of enhancing the resolution of PNG enhancer images step by step.
Choose the Right Software
To begin your journey towards higher resolution PNG images, you’ll need the right software. Popular choices include Adobe Photoshop, GIMP (GNU Image Manipulation Program), and online tools like Pixlr or Photopea. Pick the one that suits your level of expertise and budget.
Open Your Image
Launch your chosen software and open the PNG image you want to enhance. Ensure you have a high-quality, original idea to work with; starting with a low-quality image will limit the effectiveness of the enhancement process.
Duplicate the Layer
Before making any changes, it’s crucial to create a copy of the image layer. This safeguards the original image and allows you to make adjustments to the duplicate layer, preserving the quality of the source material.
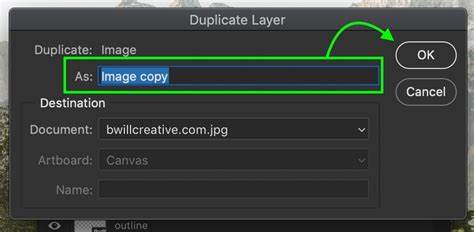
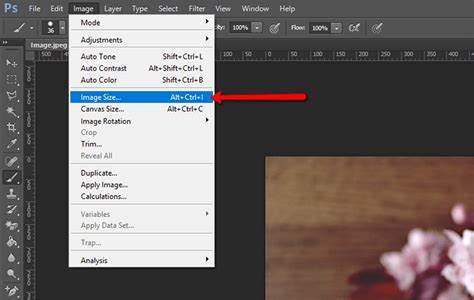
Image Size Adjustment
Go to the “Image” or “Canvas Size” option in your software. Increase the dimensions (width and height) of your image. Be cautious here, as increasing the size too much can lead to distortion. A general rule of thumb is to keep the increase in the range of 10-20% to maintain image quality.
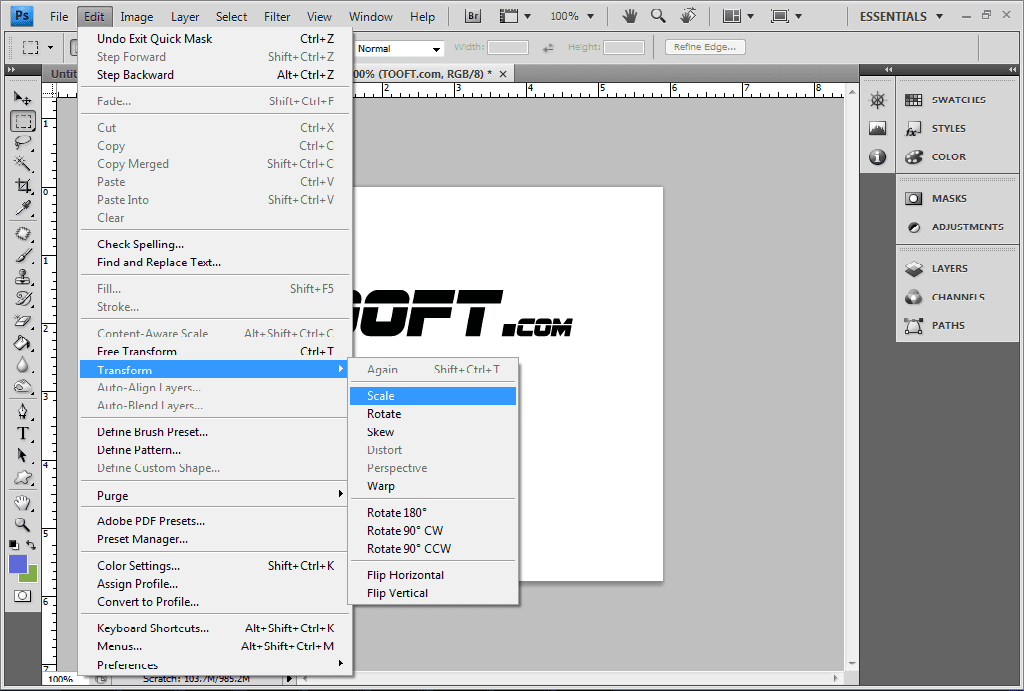
Upscale the Image
After resizing the canvas, you’ll need to upscale the image itself. Use the “Image” or “Scale” tool and set the resolution to the desired DPI (dots per inch). For print, 300 DPI is a standard choice, while for digital use, 72 DPI is common. Be sure to keep the “Resampling” method as “Bicubic” to maintain image quality.
Sharpen the Image
Increasing the resolution may lead to a loss of sharpness. To counter this, use the “Sharpen” or “Unsharp Mask” tool in your software. Apply this carefully and check the results regularly to avoid over-sharpening, which can lead to unwanted artifacts.

Save the Image
Once you’re satisfied with the enhanced resolution and image quality, save your work. Export the image as a PNG to maintain the transparency and quality of the file.
Compare the Results
It’s always a good practice to compare the enhanced image with the original. Zoom in, check for any artifacts or loss of detail and make necessary adjustments if required.
Print Test (Optional)
If you’re creating the image for print, perform a test print to ensure the final result meets your expectations. Adjustments might be necessary after reviewing the printed image.
In Conclusion
Increasing the resolution of PNG images may seem daunting at first, but with the right tools and the proper steps, it’s a manageable task. Always remember that starting with a high-quality source image is critical to obtaining satisfying results. Follow these steps carefully, and you’ll be well on your way to producing PNG images with enhanced clarity and make png higher resolution for all your creative endeavors. Happy editing!